How to Design a Coloring Book Spine

The spine is the part of your coloring book most people don't think about until it's too late.
If you're printing a short book, it may be too thin to use at all. If you're printing a longer one, a well-designed spine is one of the strongest signals of quality on a physical shelf. Either way, understanding how the spine works — and how your binding choice shapes it — will save you from surprises at the end.
This guide covers everything you need to know to handle the spine correctly, from binding options to page count thresholds to what to actually put there.
Why Publishers Require One Single Cover File
Before getting into the spine itself, it helps to understand how cover files work in print.
Most print-on-demand platforms — Amazon KDP, Lulu, IngramSpark — don't ask for your front cover as a single image. They ask for your entire cover as one flat file: front, spine, and back laid out side by side.
They provide a template (usually a PDF with guides) sized to your exact page count and paper type. The spine width in that template is calculated automatically based on how many pages your book has and what paper stock you're printing on.
This means you can't design the front cover in isolation and figure out the spine later. The full spread needs to be planned together from the start. Download your platform's template before you design a single element.
How Binding Type Affects Your Spine
The binding you choose directly determines what your spine can do — and what it needs to include.
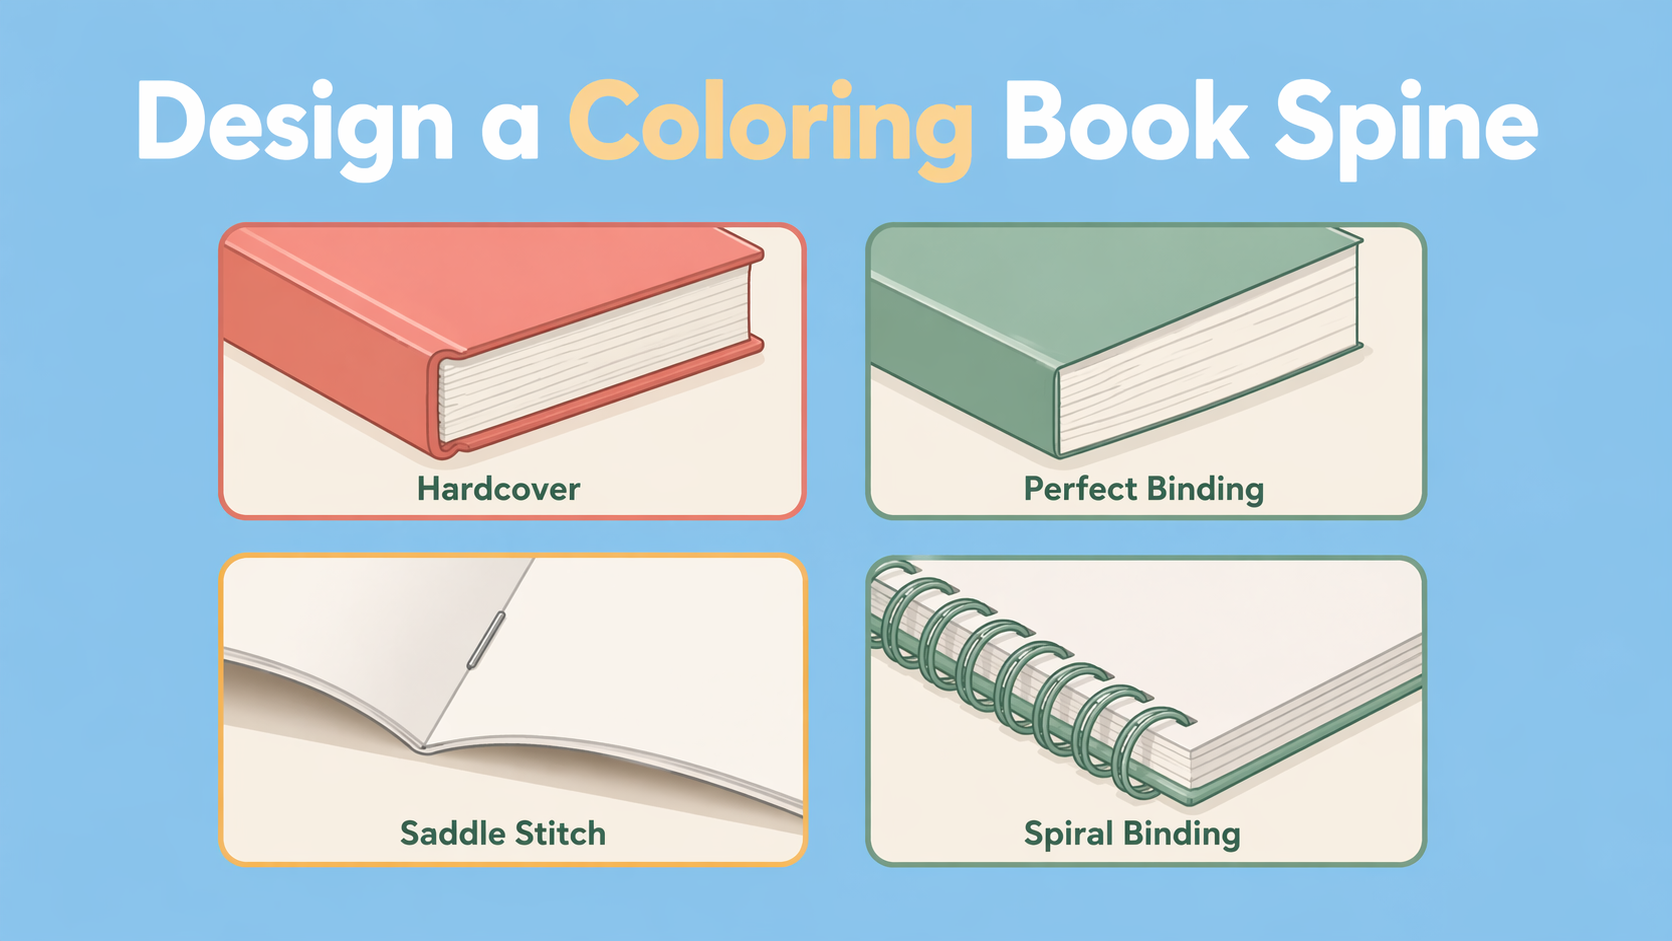
Softcover (perfect bound) is the standard paperback. Pages are glued at the spine. Most POD services produce this by default, and it's the right choice for most DIY coloring books. The spine is printable once your page count is high enough, but below roughly 80 pages it'll be too thin for readable text.
Hardcover (case bound) uses a rigid cover with a flat, square spine. It has real shelf presence and always provides a proper design surface on the spine — even at lower page counts. The tradeoff is cost: hardcover is significantly more expensive and overkill for smaller or personal projects.
Saddle-stitched (stapled) means pages are folded and stapled through the middle. There's no real spine, so your cover is just a front and back. Cheap and practical for low page counts, but there's nothing to design on the spine side.
Spiral or coil bound holds pages together with a plastic or wire coil. Extremely practical for coloring books because the book lays completely flat — no fighting pages that want to close. There's no printable spine; the coil replaces it visually. Less "book-like" in perception, but genuinely useful for the reader.
Page Count and Spine Width: What You Need to Know
For most DIY coloring books in the 10–30 page range on a POD platform: you're working with softcover, the spine is too thin to use, and your cover template will be a wide flat file with the front on the right, back on the left, and a thin spine strip in the middle.
Don't try to force text onto a spine that's 3mm wide — it won't look good in print. Leave it blank or fill it with your background color and move on.
As your page count grows, the spine becomes a real design asset:
- Around 80 pages: you can reliably fit a title on the spine
- 120+ pages: the spine becomes a key part of the overall design
- 200+ pages: author name, title, and even a small logo are all viable
The exact spine width depends on both your page count and your paper stock. White paper is slightly thinner than cream paper, which affects the calculation. Your printing platform's cover template tool will give you the precise width — always use that number rather than estimating.
What to Put on a Coloring Book Spine
If your spine is wide enough to use, here's what works.
The title is the most important element. It should run vertically from bottom to top (the standard in most English-language publishing) and be large enough to read at a glance when the book is on a shelf. If the title is long, abbreviate rather than shrink the font to the point of illegibility.
Your name or brand can go below the title, in a smaller size. At lower page counts this may not fit — prioritize the title.
Background color should match your front and back covers. A spine that's a different color from the rest of the cover looks like a production error.
What not to put on a spine: decorative elements, small illustrations, or anything that requires precise alignment. Spine printing has slightly less tolerance for misalignment than the front cover. Simple and legible is always the right call.
Bleed and Safe Zone on the Spine
The same print rules that apply to your front cover apply to the spine — with less margin for error.
Bleed still applies to the top and bottom edges of the spine. Your background color should extend into the bleed area so there's no white gap if the cut shifts.
Safe zone is more critical here. The spine is a narrow strip, and the fold lines on either side are approximate. Keep your text well centered in the spine — don't push it close to either edge. A title that drifts toward the front cover edge can end up wrapping onto the cover itself.
As a practical rule: if your design tool shows guides for the spine area, keep all text at least 2–3mm inside those guides on both sides.
Common Spine Design Mistakes (and How to Avoid Them)
Forcing text onto a spine that's too thin. If your spine is under about 5mm, leave it blank. Tiny text on a narrow spine looks worse than no text at all.
Using a different background color on the spine. The spine background should be a continuation of your cover design, not a separate panel. Match it to your front or back cover color.
Designing the spine last without the full spread open. The spine sits between your front and back covers — design decisions you make on one side affect how the spine reads. Always work on the full spread together.
Ignoring the platform template. Every printing platform calculates spine width differently based on paper stock and page count. Never guess — download the template and use its guides.
Text running the wrong direction. In English-language publishing, spine text runs from bottom to top. Text running top to bottom looks like a production error to most readers.
Step-by-Step Process for Designing a Print-Ready Coloring Book Spine
- Confirm your final page count — spine width is calculated from this
- Choose your paper stock (white or cream) — this also affects spine width
- Download the cover template from your printing platform (KDP, Lulu, IngramSpark, etc.)
- Open the full cover spread — front, spine, and back together
- Extend your background color continuously across the spine area, including into the bleed
- If your spine is wide enough (roughly 80+ pages), add your title text centered in the spine, running bottom to top
- Keep all spine text well inside the fold guides — at least 2–3mm from each edge
- Check legibility at actual print size before exporting
- Export the full spread as a single PDF at 300 DPI or higher
Create Your Coloring Book Cover and Spine Automatically with Memories in Lines
Getting the spine right requires knowing your exact page count, downloading the right template, matching background colors across a wide spread, and staying within tight safe zones on a narrow strip.
That's a lot of precision work for one narrow band of paper.
The cover tool at Memories in Lines handles all of it automatically. Upload your images, and we generate a print-ready full-spread cover — front, spine, and back — correctly sized for your page count and platform, with bleed and margins built in.
You can adjust the layout, swap images, and add a personalized title. When you're done, the file is ready to upload directly to your printing platform — no template wrangling required.
Get started at memoriesinlines.com/workspace
Frequently Asked Questions About Coloring Book Spine Design
How wide does my spine need to be to add text?
As a general rule, you need at least 5mm of spine width for text to be legible — which typically means around 80 pages or more on standard paper stock. Below that, leave the spine blank and fill it with your background color. Your printing platform's cover template tool will show you the exact width for your page count.
Which direction should spine text run on a coloring book?
In English-language publishing, spine text runs from bottom to top. This is the standard — text running top to bottom looks like a production error to most readers and bookstore buyers.
Does my spine need bleed?
Yes. The top and bottom edges of the spine meet the cover's trim edge, so bleed applies there just as it does on the front and back. Extend your background color into the bleed area to avoid white gaps if the cut shifts slightly.
Can I put an illustration on my coloring book spine?
Technically yes, but it's rarely a good idea. Spine printing has less tolerance for misalignment than the front cover, and small illustrations on a narrow strip often look blurry or misregistered in print. Stick to a solid background color and clean text.
How does page count affect spine width?
Spine width is calculated from your page count and paper stock. More pages means a wider spine. White paper is slightly thinner per page than cream paper, so the same page count produces a slightly narrower spine on white. Your printing platform's cover calculator will give you the exact number — always use that rather than estimating.
What happens to the spine if I change my page count after designing my cover?
The spine width changes, which means your full-spread template changes. If you add or remove enough pages, text that was centered on the spine may no longer be centered, or a spine that was too thin to use may now be wide enough. Always re-download your template if your final page count changes significantly.
Does binding type affect whether I can use the spine?
Yes. Softcover and hardcover books both have a printable spine, but hardcover gives you a wider, flatter spine surface even at lower page counts. Saddle-stitched (stapled) and spiral/coil-bound books have no printable spine at all — the spine area is either folded paper or replaced by the coil itself.
How does Amazon KDP calculate spine width?
KDP provides a cover calculator on their website where you enter your trim size, page count, and paper type. It generates a cover template PDF with the exact spine width marked. The spine width for a 100-page book on white paper will be different from the same page count on cream paper — always use the calculator rather than a generic formula.
Next in the seriesHow to Design the Back Cover of a Coloring Book